Layout
Frame your recording on its background with padding, rounded corners, a glass border, and a soft shadow, then save the whole look as a preset.
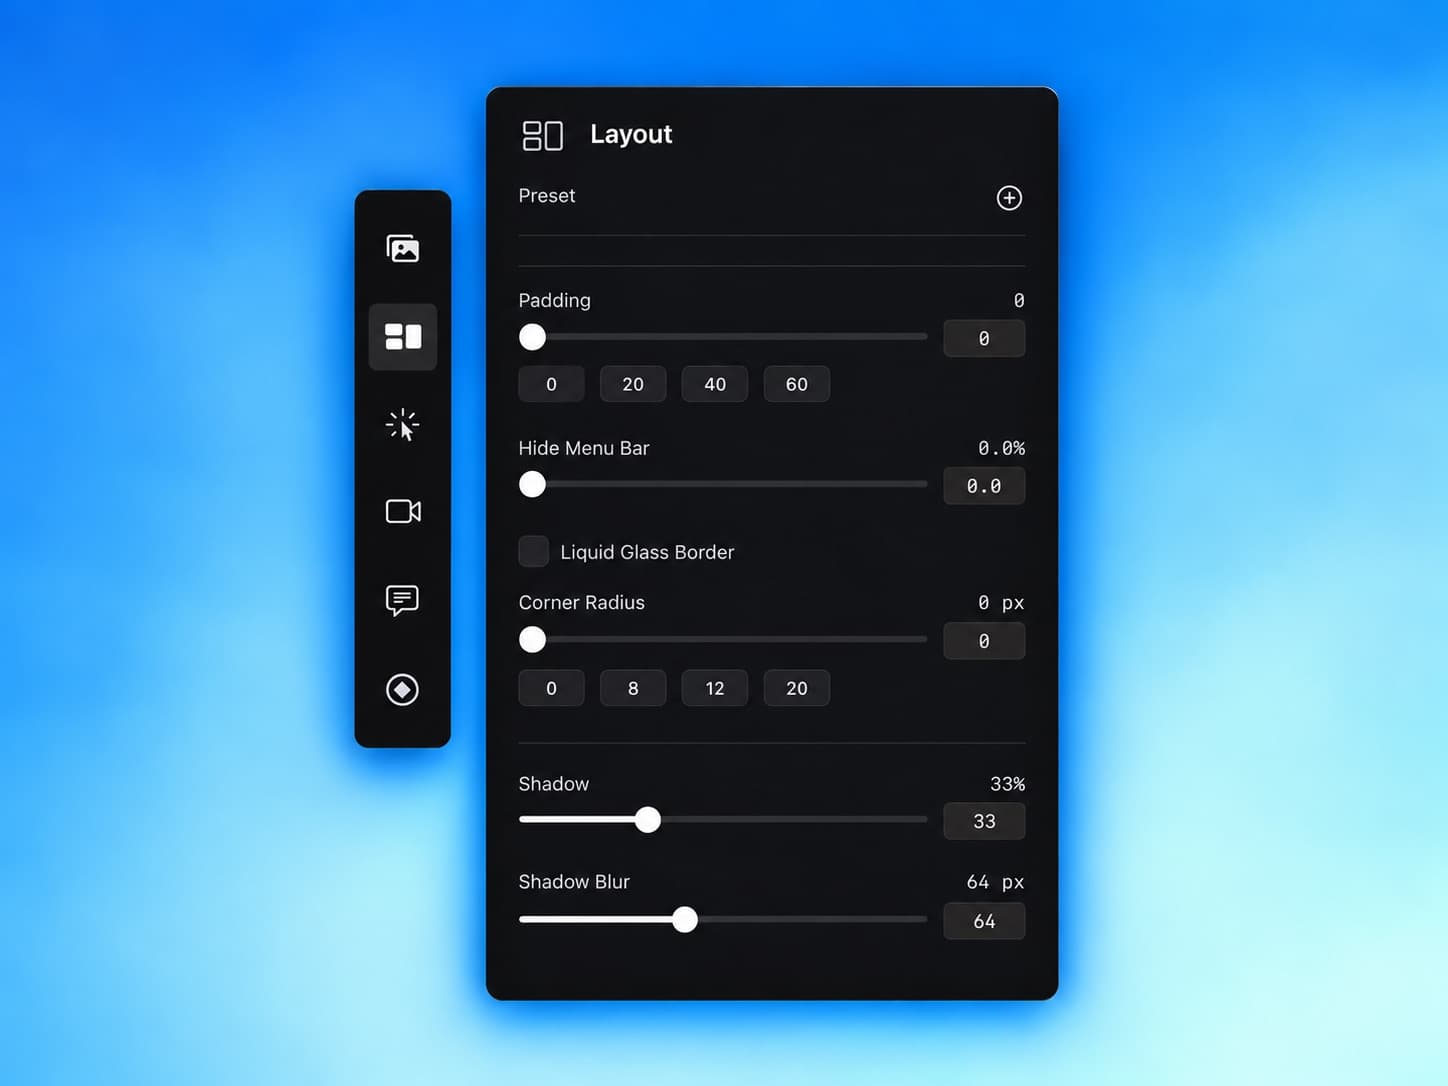
The Layout tab decides how your recording sits on the canvas: how much room it has, how its corners are shaped, and how it lifts off the background. You pick the background itself in the Background tab, just above Layout in the inspector.
Padding
Padding is the space between your recording and the edge of the frame. More padding shows more of your background and gives the video a calm, framed look. Set it to 0 when you want the screen to fill the frame edge to edge.
Drag the slider, type a number from 0 to 100, or tap one of the quick values: 0, 20, 40, or 60.
Hide the menu bar
When you record a whole display, the macOS menu bar comes along with it: the clock, Wi-Fi, and whatever icons you have up there. Hide Menu Bar trims a strip off the top of the recording, up to 10 percent. A few percent is usually enough. Drag until the bar disappears in the preview, and stop there.
Corners and border
- Corner RadiusEditor > Inspector > Layout
- Rounds the corners of the recording, from 0 to 40 px. Quick values are 0, 8, 12, and 20. Use 0 for a sharp, full-bleed look.
- Liquid Glass BorderEditor > Inspector > Layout
- Adds a thin, translucent white edge around the recording that follows its corners. It helps a dark app stand out against a dark background.
Shadow
A shadow lifts the recording off the background so it reads like a window floating above it. Shadow sets how strong it is. Shadow Blur sets how soft it is, from 1 to 200 px. Set Shadow to 0 to turn it off. Shadow Blur greys out while the shadow is off.
Soft and wide beats dark and tight
A lighter shadow with a large blur looks natural on almost any background. A dark shadow with little blur can look like a hard outline, especially once Auto Zoom moves in close.
Save a look as a preset
Found a look you like? Save it once and reuse it on every recording, so your videos match without fiddling.
- 1
Click the plus button next to Preset
Give the preset a name and choose Save. It captures the look of the frame, including your background, padding, corners, and shadow.
- 2
Load it on another recording
A Load menu appears next to Preset once you have saved one. Pick your preset and the frame updates straight away. Your camera layout stays as it is.
- 3
Delete one you no longer need
Right-click the preset and choose Delete.
Presets are stored on your Mac, so they are there in every project you open.
Last updated: October 14, 2026