Getting started
Install Drishti Studio, grant the required macOS permissions, and make your first recording.
Install the app
- 1
Download the DMG file
Download the .dmg installer for macOS. The app supports Apple Silicon and Intel Macs.
Download Drishti Studio - 2
Drag Drishti Studio to Applications
Open the .dmg and drag the app icon onto the Applications shortcut in the same window. Copy it across rather than running it from the mounted disk image, which can make permission prompts repeat.
- 3
Open the app
Launch Drishti Studio from Applications or Spotlight.
Allow two permissions
The first time you open Drishti, setup has two steps: Screen Recording, then Accessibility. Each Allow button opens the matching page in System Settings and shows a small panel just below it with the Drishti app icon. Drag the icon from the panel into the list above it, or use + to add Drishti Studio from Applications. Then turn on the switch next to Drishti Studio and return to setup to check the permission status.
1. Screen Recording
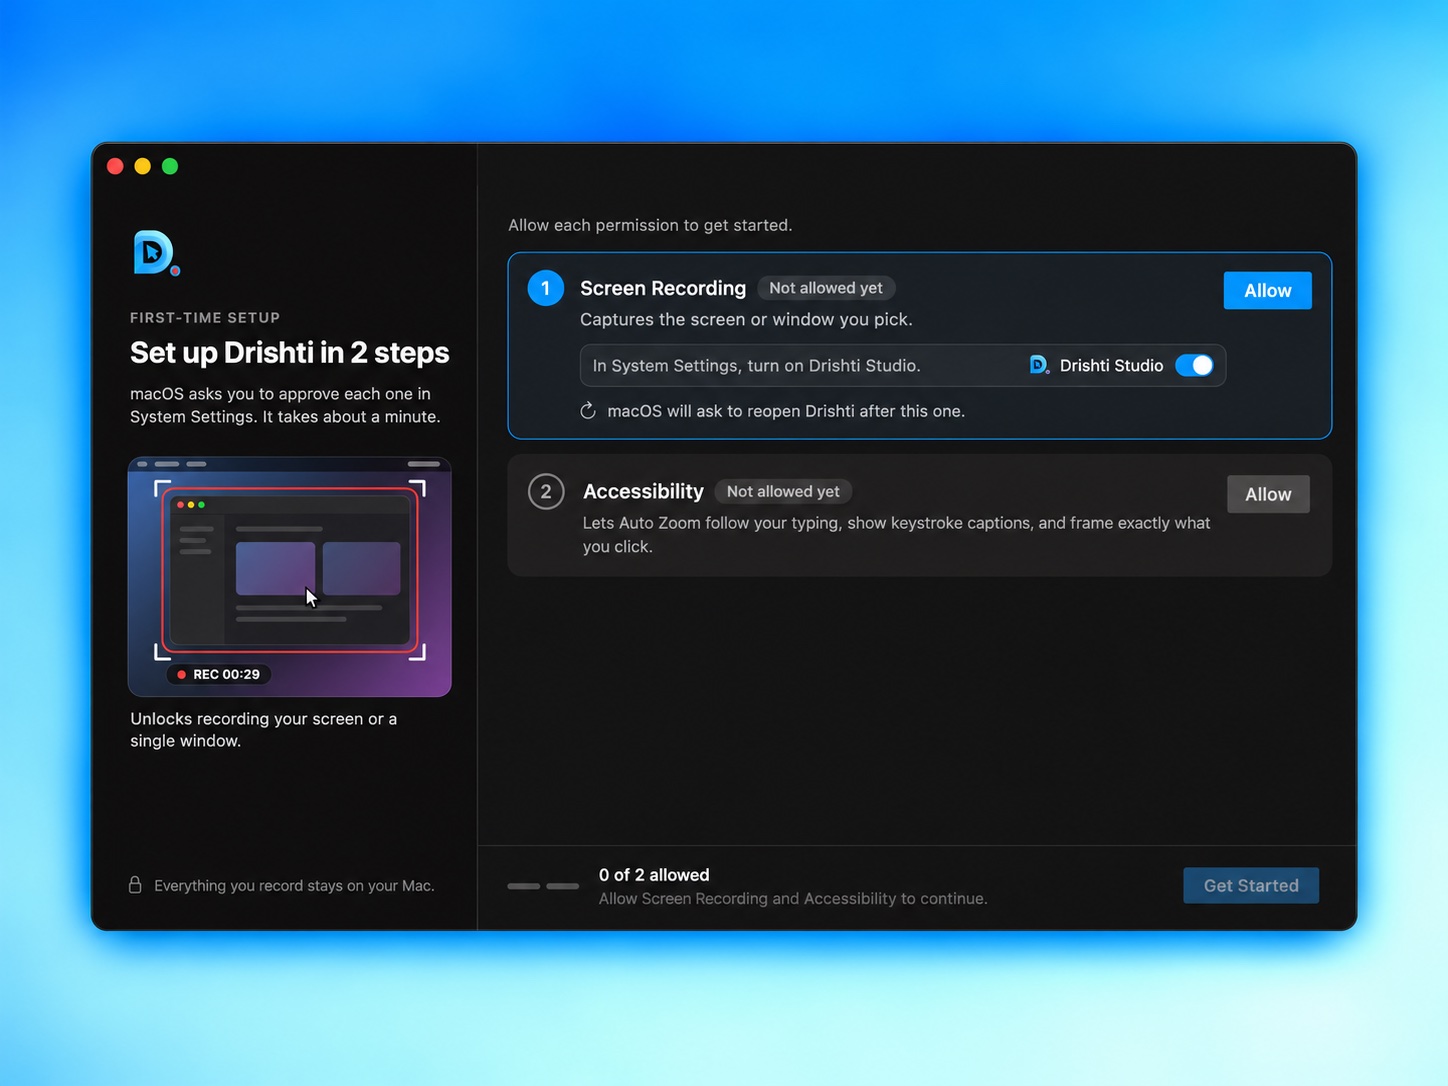
Screen Recording lets Drishti capture a display or window. Click Allow on step 1. System Settings opens Screen & System Audio Recording, with the panel below it. Drag Drishti Studio from the panel into the list, or add it with +, and turn on its switch. macOS then asks you to quit and reopen Drishti so the permission takes effect. Follow that prompt before continuing to Accessibility.
2. Accessibility
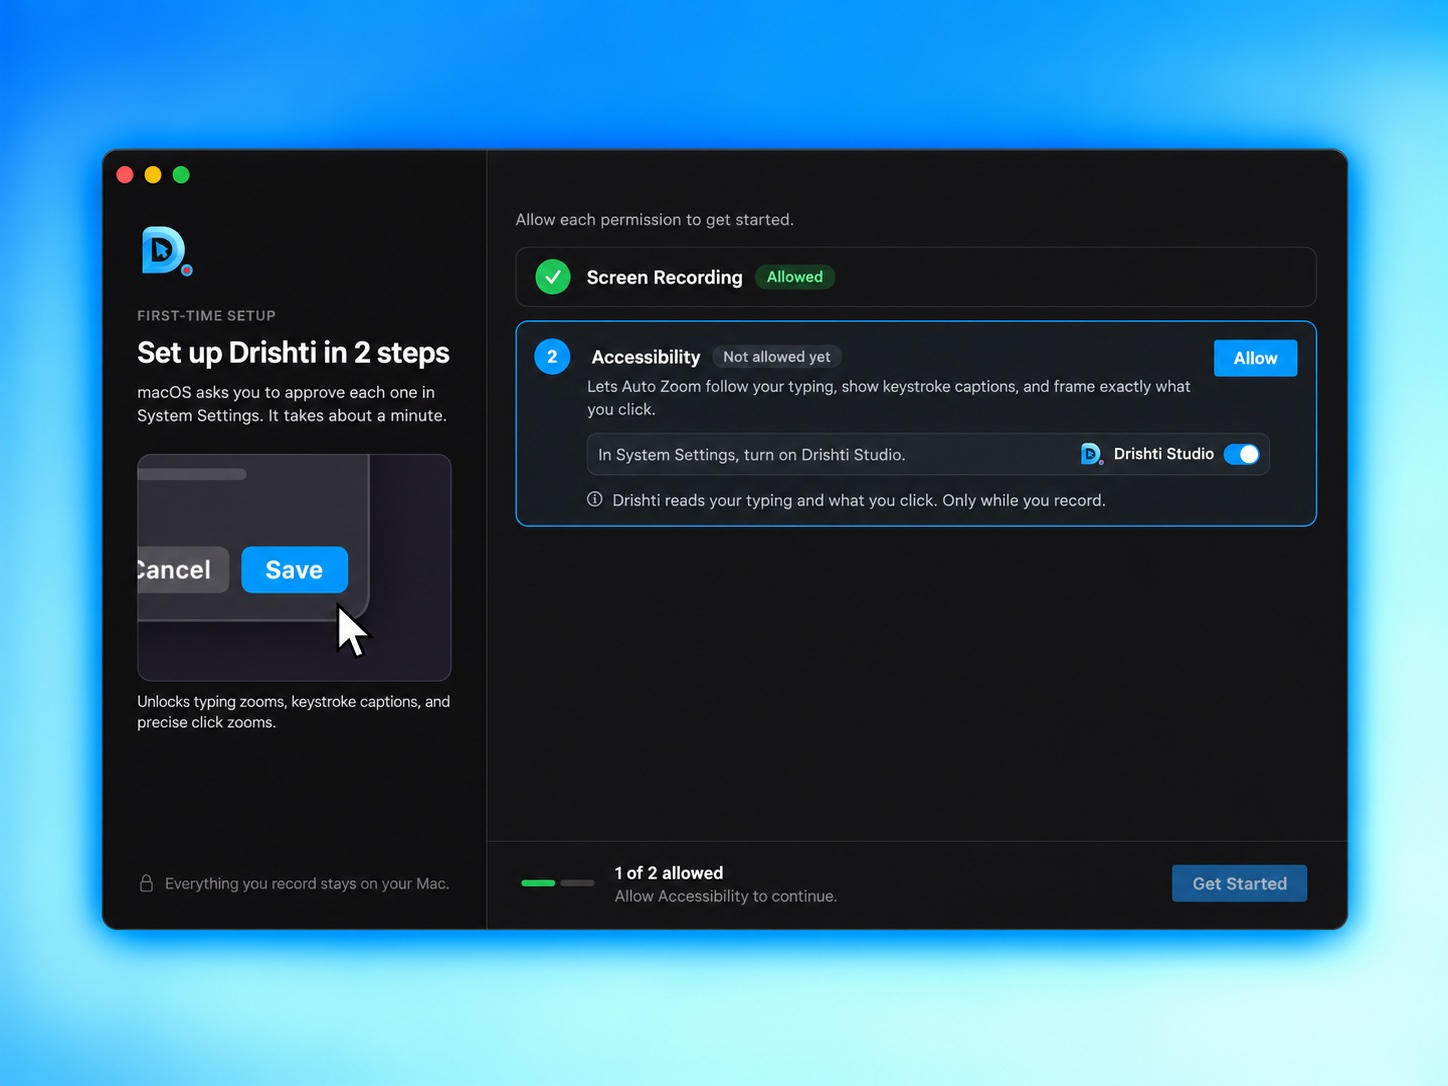
Accessibility unlocks typing zooms, keystroke captions such as the on-screen badge for ⌘C, and zooms that frame exactly what you clicked. It also lets Drishti bring the selected window to the front before recording. Click Allow on step 2, drag the app icon from the panel below System Settings into the Accessibility list or add it with +, then turn on its switch. Drishti reads your typing and clicks only while recording. This permission takes effect without reopening the app.
All set
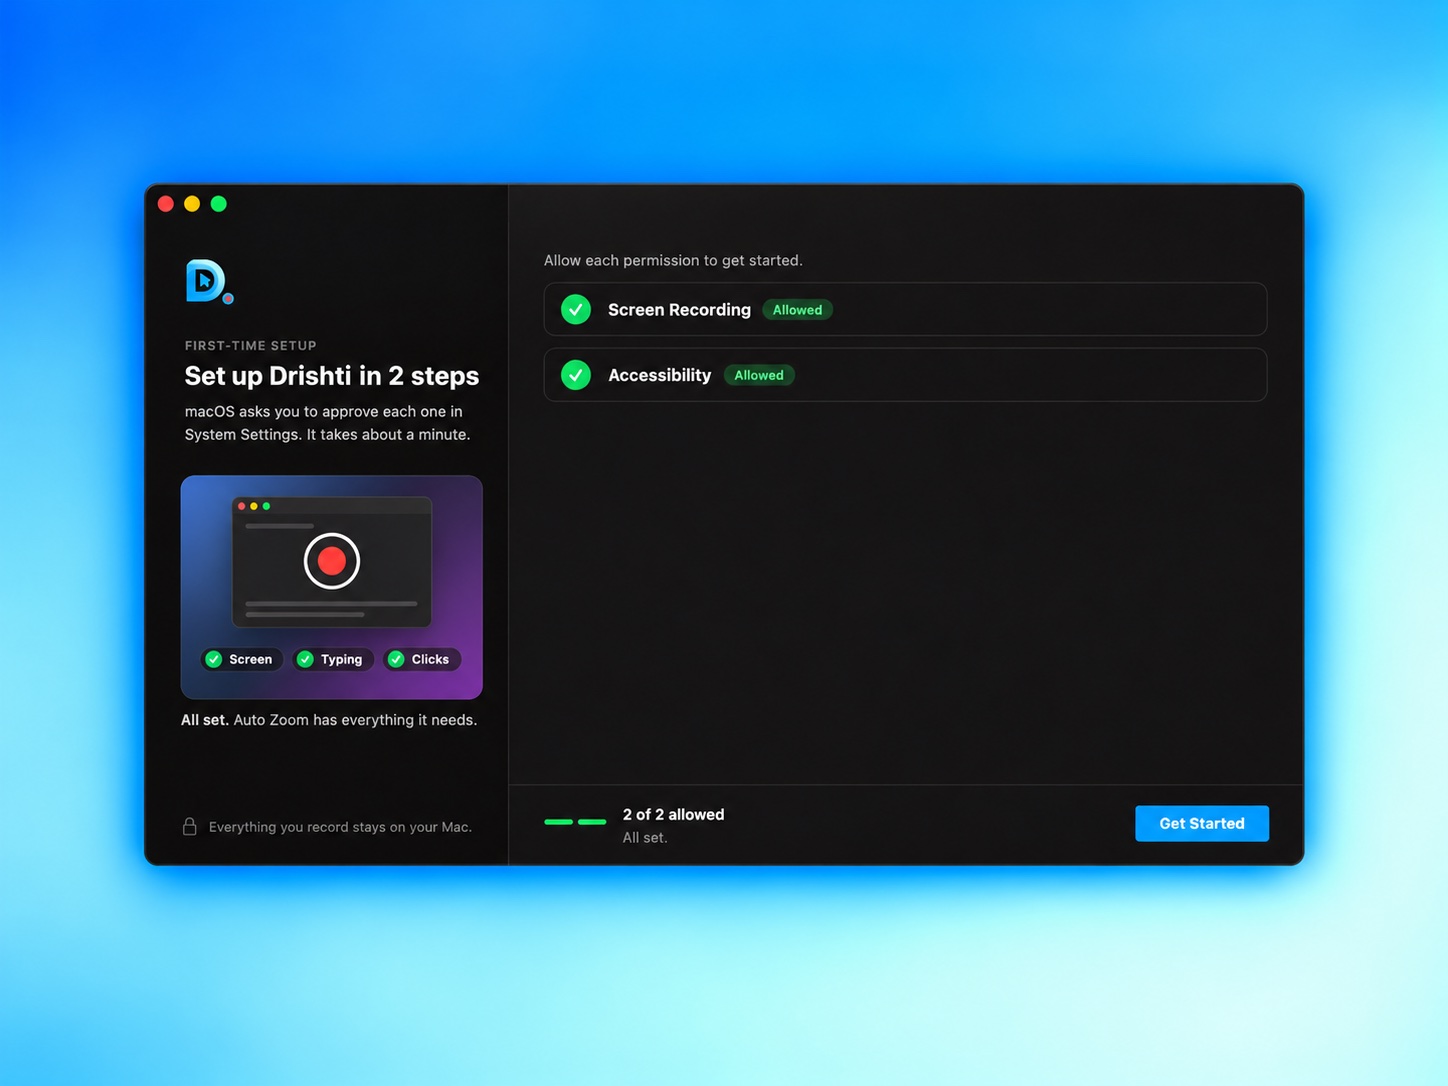
When both permissions are allowed, click Get Started to open recording setup.
Turned it on, but the step is still waiting?
Screen Recording may need Drishti to reopen before setup shows it as allowed. Follow the macOS prompt or use Reopen Drishti if the step offers it. Accessibility takes effect without reopening. If you closed System Settings or the floating panel too early, click Open System Settings again on the same step.
Microphone and Camera are not part of this setup. Drishti asks for them the first time you turn them on in Select Source. If one is blocked later, the picker tells you what the recording will miss and gives you a button that opens the right page in System Settings.
Everything stays on your Mac
These permissions let Drishti see your screen and input while you record. Your recordings are saved locally and never uploaded.
Record for the first time
- 1
Choose what to capture
Pick a whole display or a single window. Window capture follows the window if you move it and uses a 16:9 QHD output frame by default.
- 2
Set up audio and camera
Choose a microphone, decide whether to include system audio, and turn on the camera if needed. Camera layout and styling can be changed later in the editor.
- 3
Start recording
Click Record on the floating bar. A countdown gives you a moment to get ready. Window recordings activate the target window during the countdown so any animation settles before capture begins.
- 4
Stop and let the editor open
Stop from the menu bar, and Drishti opens the recording in the editor with Auto Zoom already applied to your clicks.
- 5
Review, adjust, export
Play the recording, adjust the zooms, and export a video to a folder on your Mac.
Review Auto Zoom before export
Auto Zoom uses recorded activity. Play through the generated zooms and adjust any that do not show the intended area.
Free editing and export activation
Recording and editing are free, including saving SRT/VTT subtitle files and copying the transcript. Exporting a video requires a Monthly, Yearly, or Lifetime plan. Paid plans include 16:9 exports up to 4K, 9:16 at 1080×1920, and 1:1 at 1080×1080, with no watermark. Enter the license key sent by email to unlock video export.
| Plan | Price | Notes |
|---|---|---|
| Free | $0 | Every recording and editing feature; no video export |
| Monthly | $9 / month | Cancel any time |
| Yearly | $59 / year | Cancel any time |
| Lifetime | $99 one-time | One-time payment |
Where to go next
- Recording explains capture sources, audio routing, and what to decide before you hit record.
- Auto Zoom explains how zooms are generated and how to correct one that lands wrong.
- Exporting covers codecs, resolutions, and choosing an aspect ratio for the platform you are posting to.
Last updated: October 25, 2026