Camera
Record a camera feed, tailor the camera bubble in the editor, and use timeline cues to change it during a video.
Turn on the camera
Turn on Camera in the Source picker before you record. Drishti records the feed with your screen capture and shows it as a bubble by default. If you did not record a camera feed, the Camera inspector settings apply to future recordings instead.
External cameras
Drishti supports external cameras, including DSLR and mirrorless cameras. Supported external camera feeds work without lag.
Choose a camera layout
By default the camera renders as a bubble over the screen recording. Switch to a side-by-side layout to give the camera its own column next to the screen instead. Set this in Editor > Inspector > Camera > Camera Layout.
| Layout | Result |
|---|---|
| Default | The camera renders as a bubble positioned over the screen recording. |
| Camera Left | The camera gets its own column on the left. The screen fills the rest of the frame. |
| Camera Right | The camera gets its own column on the right. The screen fills the rest of the frame. |
In Camera Left or Camera Right, use Camera Size in the same inspector to set how much of the frame width the camera column takes up.
Side-by-side layouts turn off Auto Zoom
Camera Left and Camera Right are exclusive with Auto Zoom for that recording. Switch back to Default to use Auto Zoom again.
Style the camera bubble
Open the Camera tab in the editor inspector to change the bubble after recording. These controls affect the recording you are editing, so you can refine the presentation without another take.
- AnchorEditor > Inspector > Camera
- Place the bubble in one of nine positions, including each corner, an edge center, or the middle of the frame.
- SizeEditor > Inspector > Camera
- Set how large the bubble appears over the screen recording.
- Camera AspectEditor > Inspector > Camera
- Choose Circle, Square, Widescreen, or Squircle for the bubble shape.
- RoundnessEditor > Inspector > Camera
- Adjust the corner radius for shapes that allow it.
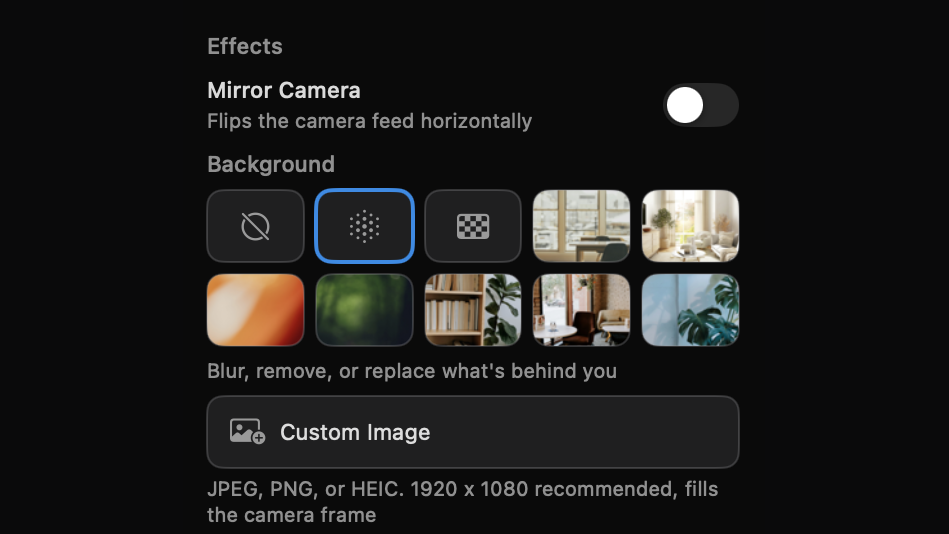
- Mirror CameraEditor > Inspector > Camera
- Flip the camera feed horizontally.
- BackgroundEditor > Inspector > Camera
- Choose None, Blur, Transparent, or one of seven preset photo backgrounds (Office, Home, Studio, Forest, Library, Cafe, Plants), or tap Custom Image to use your own JPEG, PNG, or HEIC. 1920 x 1080 is recommended, and the image fills the camera frame.
- BorderEditor > Inspector > Camera
- Turn on a border and adjust its appearance around the bubble.
Use camera cues on the timeline
The Camera Cue track lets you change the bubble for a stretch of the timeline without keyframing. Add a Camera Cue at the playhead, then select its pill to edit its timing and settings.
| Cue | Result |
|---|---|
| Default | Keeps the camera as a bubble and can override its position or size for that stretch. |
| None | Hides the bubble for that stretch. The recorded audio continues. |
| Full Screen | Expands the camera feed to fill the canvas for that stretch. |
- 1
Move the playhead
Go to the point where you want the camera change to begin.
- 2
Add a Camera Cue
Choose Camera Cue in the timeline toolbar. A cue pill appears on the Camera Cue track.
- 3
Choose a mode
Select the cue pill, then choose Default, None, or Full Screen in the inspector.
- 4
Set its duration
Drag the cue edges on the timeline to cover the intended section, then play it back to check the change.
Review before export
- Keep the bubble away from controls, captions, or information the viewer needs to read.
- Use None for a short section where the screen needs the full frame.
- Use Full Screen when your face or an external-camera shot needs to become the focus.
Last updated: September 14, 2026